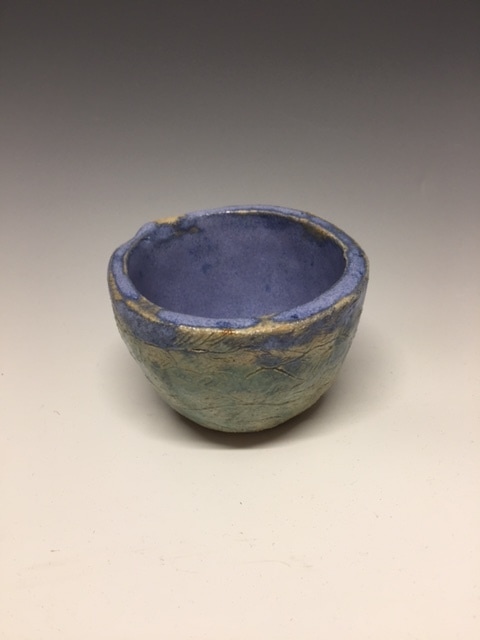
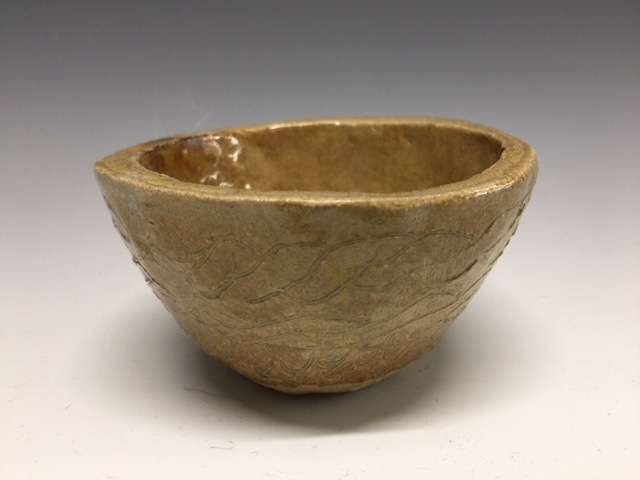
The Pinch Pot is created by starting of with about a hand full of clay. To start of the clay is first rolled into a ball. Then to start off the hollowing out process, you place your thumb in the top of the ball creating a hole. Placing your thumb in the hole and four fingers around the rest of the ball, pinching will start the pinch pot building process. As the You start pinching with one hand use your free hand to rotate the pot as you pinch to pot to get an even spread of the clay in the pot. after fully completing this process you may notice cracks at the top of the pot. to remove theys, place the pot on a rotating table and rotate the pot while placing a foundling knife at the top to get an even rim. To then remove the sharp edges created by the knife use a damp sponge and run it along the top to remove the sharp edges. it is important to remember to take your time while completing theys step. you will notice the significant difference if you put your time and effort into making sure your pinch pot is perfect. Once finished with the actual pot I carved a design into them. the design on the left was inspired by the way hair flows and the one on the right is ment to look like rope. Afterwards They where glazed and fired to get the final looking product you see here
|
|
